Welcome. We’re going to begin with some personalizing and housekeeping on your blogs before we proceed with the next blogging assignment. Before you continue, make sure you are logged in to the blog site by looking for your name at the top of the page.
1) Change your nickname that will appear with your posts and comments. Choose ‘Edit my profile’ from the drop down menu where it says, “Howdy” in the upper right corner. ** Also make sure to change the “Display name publicly as” setting, too.
2) Go to ‘Widgets’ under the ‘Appearance’ tab on the left side of your dashboard. Drag the ‘Class Blog’ widget to the widget area.
Then increase the number of blogs (not characters) on this widget to 30.
3) Set the correct time zone under ‘Settings’ > ‘General’ Choose ‘Denver’, it’s in our time zone.
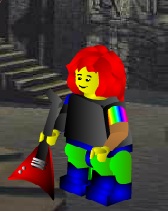
4) Finally, create a user avatar that will appear next to all your blog comments. Please use one of the sites below to create your avatar. After you create it and save it to your “H” drive (right-click, save picture as). Allowed Formats: jpeg, gif, and png (not bmp). You will need to use Powerpoint to save it as a JPG file. Then upload it on your Dashboard, under Users > Your Avatar.
After all that, proceed to the Blog Exploration assignment.
Moeruavatar (this one might be blocked at school; you can access from home)
Mini Mizer Lego Avatar creator
Avatar Maker — student recommended! Thanks Shelby!
There are some great ones here. I haven’t tried them yet. Let me know if they are any good.
Other avatar sites and instructions for saving and cropping can be found here.
Have fun!


